Leaderboard


Popular Content
Showing content with the highest reputation on 04/07/2016 in all areas
-
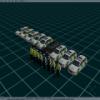
This is tutorial assumes that you already know the basics of Zmodeler. These are the steps I take to model a vehicle from scratch. Incomplete so far while I model this vehicle. You need a picture of the vehicle from the side, google is your friend. Add the image using the display button. You can add an image on any view, but in our case, do it for the left or right side, depending on the orientation of the image you are using. Make a surface and that becomes a start for the vehicle. Once the model is extruded, you should end up with something that captures most of the details. You may have to make adjustments to the mesh of the model before you are able to get all the details in. Also you may need to add entire rows/columns of polygons just to accomodate some details that you may have missed in the original modelling process. Try to keep the shape smooth for the most part, except for any indents on the actual bodywork. Shading also helps bring out some dimension to it, so definitely needed for getting it right. I haven't finished this example yet due to lack of time and will be posting a newer, more complete version soon. This temporary example still doesnt have a rear and front bumper, and lacks the door trim. Now that we have the side body done, the next step to be made is the roof. It is far easier than making the front and rear because car roofs are almost always flat. Using what we've applied, create a row of polygons that represent the roof. To make things quicker, we can copy paste those new roof polygons by detaching them with the "keep as new" button. Modelling the roof: Create new polygons on the top of the model, right where the roof starts. Align the newly created vertices, then continue the row until you reach the center of the model. Try to follow the curvature and angle of the roof based on the reference pictures, but you do not need to follow the picture exactly. As long as it looks correct in 3D, that is what matters above all. Continue making columns of polygons. You can make them by hand, or create copies of that first row to save time. The next pictures make use of the copy method. If you do not wish to use this method, skip to Step 9: Move the vertices to the correct points on the model. Attach the newly created row copy to the main model. Completing the copy method, and welding the vertices to fill all gaps. Step 9: Once we have the roof done, its time to do the windshield and the hood. Let's observe again. We need to pay close attention to the most visible details of the vehicle. Using what you already know, keep on making rows and columns to set the windshield up. And after a while, you should have the hood down. Modelling the front: Once you're past the corner, let's do the bumper. And now to fill the gap on the front end. Now to do that headlight. Modelling the rear Now for the bumper1 point
-
We proudly present the revamped New York City Modification v2.0! Currently still in heavy development, we have been working on a new version of this mod. The mod will contain many new features, such as a progressive style of gameplay, unique missionscripted events, interface changes, new functionalities and -of course- a new map. In this first report we'll show you pictures of the new map we're working on. The new mod is fixed in a post-9/11 era to about 2008. We didn't want to focus on updating vehicles constantly, instead we're focussing on improving gameplay elements, trying to keep the game challenging and fun. We'll release more information regarding gameplay changes later. The new map is fictional and won't be a copy of a real part of New York City. Instead we choose to make a more compact map with many (downsized) landmarks and influences from New York City and the North-Eastern American environment. This way, the map will provide a lot of variation with many things to get into. Pictures say more than words, so have fun watching the editor screenshots below: New screenshots 04/13/2015: In regards to current mod status: the core gameplay elements are done, but the new map isn't even halfway done and still requires a lot of work. Don't expect a release anytime soon.1 point
-
where can i download it please? i don't see any link1 point
-
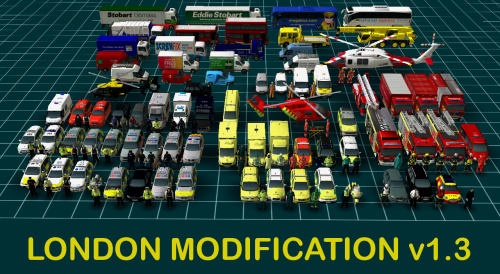
Version v1.3
219,671 downloads
This is the latest version of the London Modification which includes a new edited freeplay map with various UK buildings and civil traffic along with updated units & personnel from the capital’s main emergency response services: The Metropolitan Police, London Ambulance Service & London Fire Brigade. Version 1.3 also includes new units from the City of London Police, British Transport Police & London’s Air Ambulance. Updates, information and any news about future versions of the mod can be found on the London Mod forum page: http://www.emergency-planet.com/topic/7861-london-mod-in-progress/#comment-98073-1 points -
do us all a favor and get off your high hoarse and let everyone play the dam game without u bitching like a baby-1 points